If you are still emailing files from your iPhone to people nearby or are still using a USB thumb drive to transfer a few photos from your Mac, stop. Try AirDrop instead. Whether you have an iPhone 14, an iPad Mini or a new M2 MacBook Pro, AirDrop is the most convenient way to transfer files and content from one Apple device to another. AirDrop lets you share photos, documents, videos, audio recordings, contact cards, web links and notes (among other things) quickly between Apple devices.

Brett Pearce/CNET
AirDrop is limited to iOS and MacOS. (Sorry, Android and PC users.) When AirDrop came out in 2012 it was one of the features that separated the iPhone from Android phones. If you have an Android phone, Google has its own version of AirDrop called Nearby Share which does something similar.
You don’t even need the latest iPhone 14 Pro or a 16-inch MacBook Pro with an M2 Max chip to use AirDrop. It works with any iOS device running iOS 7 or newer and any Mac running OS X Yosemite or newer. The only “requirement” is that both devices are within 30 feet of each other and have both Wi-Fi and Bluetooth turned on. So far as I can tell, there isn’t a limit to the size of the file you AirDrop. Just know that the bigger the file, the longer it will take to transfer.
If you’d like to follow along step-by-step as I set up and use AirDrop, watch the video below.
How to turn on AirDrop
From an iPhone, make sure Wi-Fi and Bluetooth are both turned on. Next, open the Control Center panel, then push and hold the wireless connection icon until it expands into a rectangle. Last, tap AirDrop and choose from Receiving Off, Contacts Only or Everyone to control who can send files to your phone.
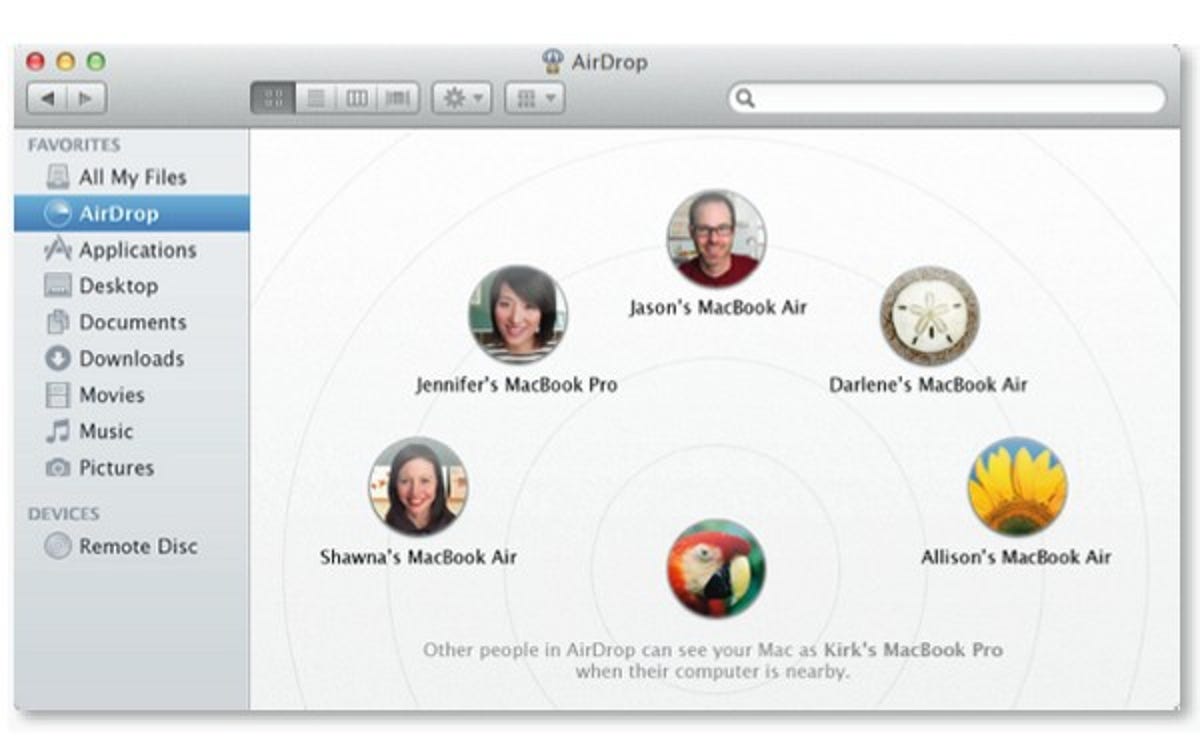
On a Mac, check that you have Wi-Fi and Bluetooth enabled. Open a Finder window. Then, from the sidebar click on AirDrop. A window will open with a radar-like graphic. Anyone nearby with AirDrop enabled will appear in this window. At the bottom of the window, you can select who can send stuff to you: No One, Contacts or Everyone.
How to AirDrop on an iPhone
To use AirDrop on an iPhone, the person you’re sending files to needs to have an Apple device with Wi-Fi and Bluetooth turned on. If either of you has a Personal Hotspot enabled, turn it off; otherwise AirDrop won’t work. The same is true if you’re using a VPN. I’m not sure exactly why this is, but I’d guess it has something to do with the way a VPN encrypts your internet connection.
Anytime you see a Share button on your phone (the rectangle icon with an arrow pointing up), you can select AirDrop. When you do, you’ll be shown a list of any nearby Apple devices that also have AirDrop enabled. Tap the name of the device you want to send to. For example, say you’re in the Photos app and you see a picture you want to AirDrop. Tap the Share button to open the Share menu. At the bottom of the menu, tap the AirDrop icon. Next a window will appear with anyone nearby who has AirDrop enabled. Find the person you want to send the photo to and tap their contact icon.
Next, a window alert with a preview of the content you’re sharing will pop up on the recipient’s phone. They have the option to Accept or Decline. Once they tap Accept, the photo you selected will be transferred. Pictures and videos are saved into the Photos app on the recipient’s phone. Documents will prompt the receiver to choose an app to save them to. Web links will automatically open in your default web browser, which for most people will be Safari.
If the person you’re sending to has their AirDrop set to Contacts Only, then they’ll need to have a contact card in the Contacts app that has either your email address or phone number in order for this to work. If you’re not in their Contacts, have them change their AirDrop preference to Everyone to receive your file.

In iOS, when you tap on the Share menu, a dialog box pops up showing people nearby with AirDrop activated. Tap on the person you want to share with.
Charles Wagner/CNET
How to AirDrop on a Mac
To start, make sure your Mac’s Wi-Fi and Bluetooth are both on, then open a Finder window. Next, from the sidebar click on AirDrop. To share a file, simply drag and drop it onto the contact icon for the person you want in the AirDrop window. Also, just like on iOS, you can access AirDrop anytime you see the Share button.

On a Mac, the Finder window shows anyone with AirDrop enabled nearby,
Screenshot/CNET
If you’re having trouble sending a file over AirDrop from a Mac, click the Don’t see who you’re looking for button at the bottom of the AirDrop Finder window. Then, click the Search For An Older Mac button that pops up.
How to AirDrop from iPhone to Mac (or vice versa)
If you want to AirDrop content from an iPhone to a Mac, start with the content. For example, if you want to AirDrop a web link, have the page opened on your iPhone. Then open the Share menu and tap the AirDrop icon. Next, select the Mac icon and name for the device you want to send the web link to. The recipient’s Mac will show a prompt asking them to Accept or Decline. Once they tap Accept, the web link will transfer and open in their default web browser.
If you want to AirDrop from your iPhone to your Mac, and both are signed into the same Apple ID, you won’t see an option to Accept or Decline. The transfer will just happen.
How to change your AirDrop name
Your AirDrop name is the same as your general device name. To check it or change it on an iPhone, open Settings. Tap General, then tap About. The first item in the list shows the current name of your iPhone. Simply tap to change it.
Now that you have mastered the art of AirDrop, take a look at other helpful iPhone tips and tricks below.


![Best Weight Loss Supplements [2022-23] New Reports!](https://technologytangle.com/wp-content/uploads/2022/12/p1-1170962-1670840878.png)


